Has there been a greater invention to make quilt making easier than the rotary cutting system?
We love vintage quilts but they are even more impressive when you realize that the fabrics were all cut by hand with scissors, probably traced from templates. As contemporary quilters, we are blessed with so many tools that make things easier and allow us to make the intricate designs we love with precision measurements at reasonable speed.
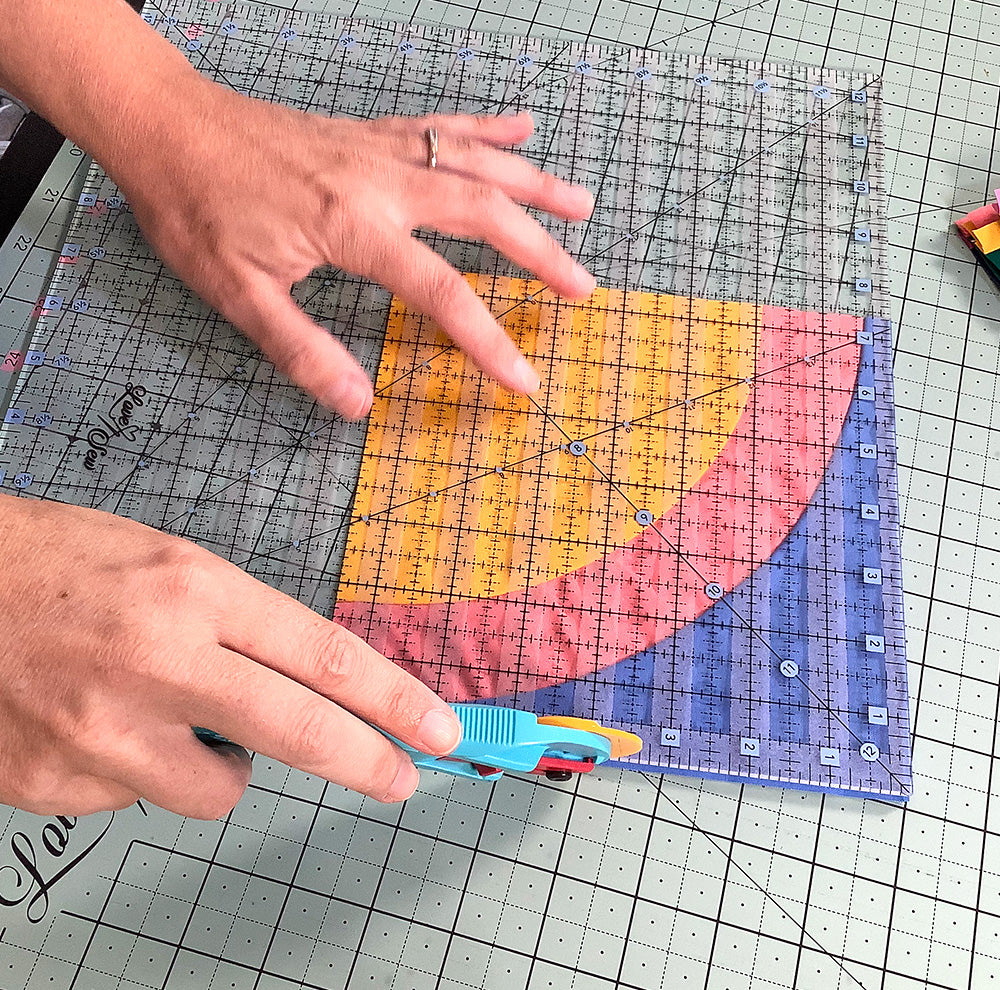
For all of you newer quilters, one of the first skills that is essential to learn is using a rotary cutter, ruler, and self-healing mat to cut your fabrics to size. Your pattern instructions will include the quantities and sizes for the pieces you need for piecing the design, but most patterns don't include the 'how' of cutting those pieces.

This week on You Tube, we've uploaded a new video that features a comprehensive tutorial on all things rotary cutting. You'll see how to read a ruler and use it to measure the fabrics for cutting basic shapes like strips, squares, and rectangles - for left and right handed quilters.
If you don't have the essentials, find all the tools you need right here at Love Sew:
Rulers: we recommend having at least one ruler that is long for cutting strips from full width of fabric pieces (most standard quilting fabric with selvedge is approximately 44" wide and comes folded to 22") plus one that is smaller for manageable cutting of shapes for piecing. My personal favorites are the 12 1/2" square and the 8" x 12 1/2" rulers for everyday use.
Definitely consider the 3" x 22 1/2" ruler, it is extremely handy!
Cutting Mats: You'll need a self-healing mat designed for rotary cutting. This is essential for protecting your work surface - table or countertop - as well as keeping your cutting blades from wearing out quicker than you want them to. For beginners, choose a medium size cutting mat for convenience. I recommend the 24" x 18" mat as a good all-around mat.
Rotary Cutter: this is the main attraction here, the cutter features a round blade fixed into a handle. The blade rolls over the mat as you cut through the fabric -picture a pizza cutter in your kitchen - and rides against the edge of the ruler for straight cuts at the measurement you want. Once you have a cutter, you'll just need replacement blades for when they get dull. You don't need to buy a new cutter, just change out the blade.
Okay, now you have all the tools you need, watch the video to learn all the right techniques to measure and cut perfect pieces for every quilt.
happy stitches!
Sharon
Leave a comment
This site is protected by hCaptcha and the hCaptcha Privacy Policy and Terms of Service apply.