It probably doesn't surprise you, but we get lots of requests for how to make a given quilt pattern larger. You quilters like your queen size quilts!
That is why I thought I'd pop in today to show how to make one of our most popular quilt patterns queen size and you can apply this concept to any other quilt you like. Today's instructions show how to make the Star Light quilt queen size by adding additional blocks. In a future post we will talk about adding size with borders.

For any repeating block style pattern you want to make larger the first step is to decide how much bigger you want it. This will depend on the size of the quilt made with the original pattern (that's your starting point), how large you want the finished quilt, and the size of the blocks.
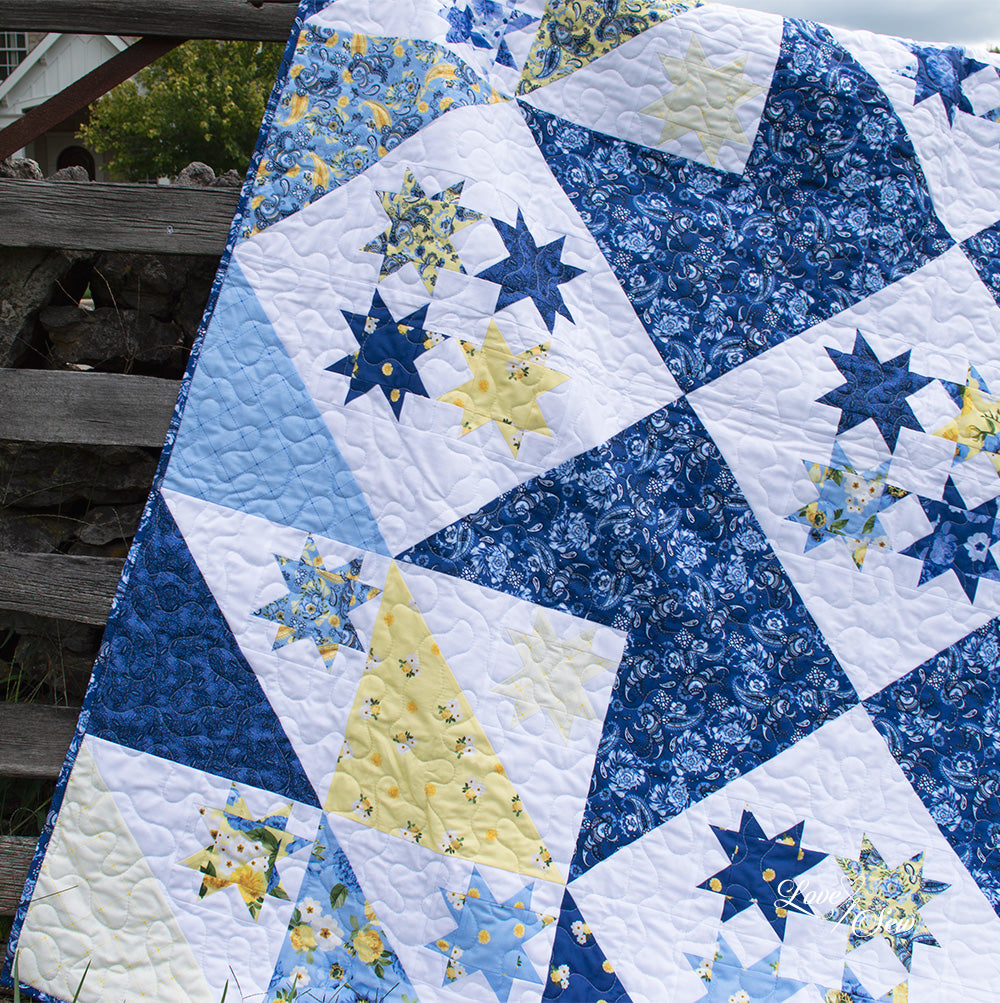
So, even though Star Light isn't literally a repeating block pattern, it is enough that you can use the same strategy. We will make additional star blocks and sew them in orientation to continue the pattern outward from the center medallion.
First step: the pattern quilt finishes 72" x 72".
Second step: how large do we want the finished quilt? Queen size. This is somewhat flexible, so let's say around 100", but it will depend on what makes sense based on the size of the blocks.
Third step: what is the size of the block and what 'makes sense' for adding on to get the size we want? The blocks are 12" square so we have a couple options.
We could add one row to all four sides and make a quilt that is 96" x 96". That keeps the original square shape at the size we want.
Since the blocks are rather large, adding more than one row on all four sides would get way too big. Factor in the symmetrical pattern/design of the quilt and let's say adding one row all the way around is our best option.
Note: for quilts with smaller blocks or with a simple repeating design, you could make the quilt rectangle if you want by adding only to the top and bottom or some combination of additional rows on top and/or sides to get the size you want. This is where the "what makes sense" caveat comes in from step 2.

Let's do it! First thing is to determine how many blocks we need to make in addition to the original quilt. Count the number of blocks in each horizontal row. For Star Light, each row is 6 blocks wide and since we want an additional row on top and bottom, we will need 12 additional star blocks. In the image above, see how it looks with the additional rows on top and bottom. Follow steps 1-11 in your pattern to make 12 more blocks.
Pay attention to how the blocks form a pattern and make sure you orient them correctly. This may or may not be a factor in any other quilt pattern to which you add additional blocks.
Now we need to figure out how many blocks to make for the two additional rows for the left and right sides of the quilt, which is now 8 blocks long so we need 16 more star blocks. Follow steps 1-11 to make 16 more star blocks.

Arrange the additional side rows to add to the left and right sides of the quilt. Again, make sure you pay attention to the orientation of the blocks to continue the established pattern.
This looks gorgeous! I love that this pattern features large pieces to really show the pretty prints. It's ideal for larger scale fabrics you don't want to cut too much.
Let's see those BIIIIIG quilts now that you can upsize any block-based pattern you have. Make sure you share what you make in the Love Sew Facebook group!
happy stitches!
-Sharon
word:
If you are making the Star Light quilt pattern or kit and want to do what I've shown above, purchase one kit, plus an additional fat quarter bundle of Sunshine Blooms and a 2 yard cut of Marshmallow from the True Fabrics solids collection. The kit will include enough fabric for binding the larger quilt, so you won't need any additional binding fabric but you will need additional backing fabric.
Star Light is also available as a single pattern so you can choose your own fabrics, Here.


7 comments
Celia Hefner
Most people only think to add solid borders to enlarge a quilt, which is not wrong , but on a pattern with no borders this looks so much better. I think not knowing the amount of fabric extra needed is what holds most people up from doing this. Great instructions, good lesson!
Amy Bevilockway
Thank you for sharing. I often enlarge quilts but enlarging the star is very educational. Keep up the good ideas.
Leave a comment
This site is protected by hCaptcha and the hCaptcha Privacy Policy and Terms of Service apply.